DataSunrise SSO Authentication Based on OpenID (Okta)
Previously, we described how to make Single sign-on authentication (SSO) based on SAML with the help of Okta. SSO is a useful tool when you need to authenticate in different applications or websites with one set of credentials. That is why we also implemented SSO authentication based on another popular standard OpenID.
Today we will describe how to configure SSO authentication based on OpenID with Okta. OpenID is one of the most popular authentication options. It is the protocol that provides authentication by creating a new token specifically for identity. OpenID enables you to use one login session across different applications and services.
Adding a New Application in Okta
To enable Open ID authentication to the DataSunrise’s Web Console, do the following:
Register in the Okta service. Navigate to Dashboard and click Create App Integration.
On the Create a new app integration tab, select OpenID Connect as Sign-in method and Web Application as Application type.
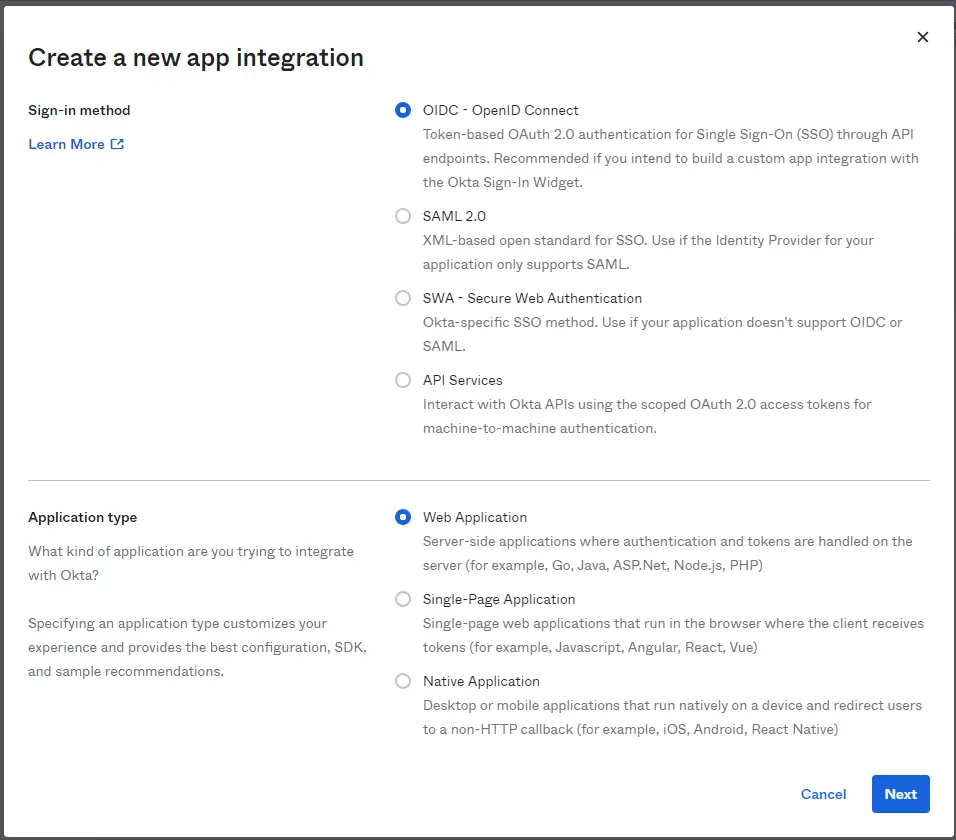
Picture1: Creating a New App
On the next tab, set the app integration name (any) and input the following URL:
https://<DataSunrise_IP_address>:11000/sso_endpoint
For example:
https://127.0.0.1:11000/sso_endpoint
https://localhost:11000/sso_endpoint
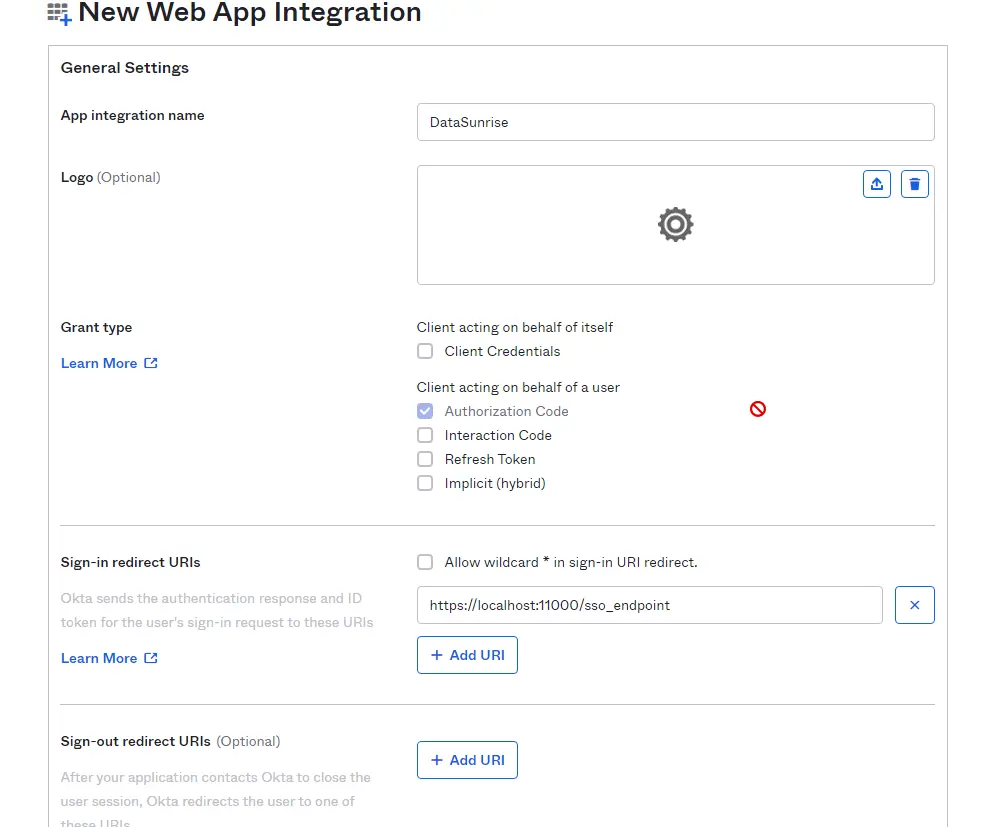
Picture 2: New App Integration
Go to the following page:
https://developer.okta.com/docs/reference/api/oidc/#well-known-openid-configuration. See Request Example. Copy the first part of the query (for example):
https://datasunriseantony.okta.com/oath2/${authServerId}/.well-known/openid-configurationAnd delete the middle part of it:
oauth2/${authServerId}The query should look like the following:
https://datasunriseantony.okta.com/.well-known/openid-configuration
Open this query in your web browser for query results.
Note that you will need the following values from there:
authorization_endpoint
token_endpoint
jwks_uri
Go to Okta’s Dashboard and navigate to Application → Your App → General → Client Credentials. Note that you will need the Client ID and Client secret parameter’s values:
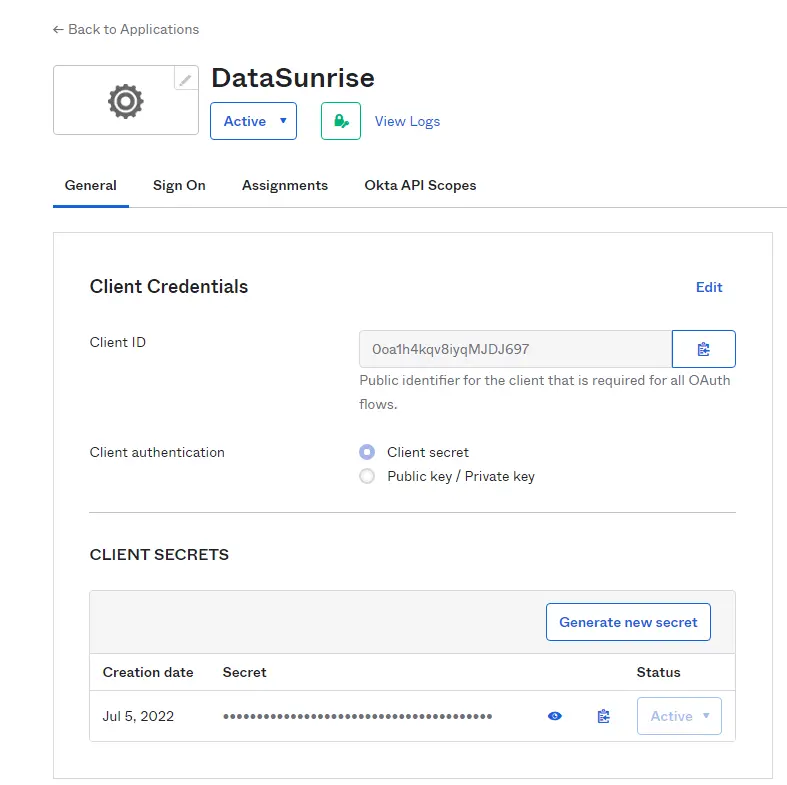
Picture 3: Client Credentials
Configuring SSO in DataSunrise
Enter the DataSunrise’s Web Console. Note that you need to specify the full IP address instead of just a hostname. For example:
https://127.0.0.1:11000
Navigate to System Settings → SSO, click Add SSO Service.
Input a logical name (any), select OpenID Connect in the SSO Service Type. Input the following values:
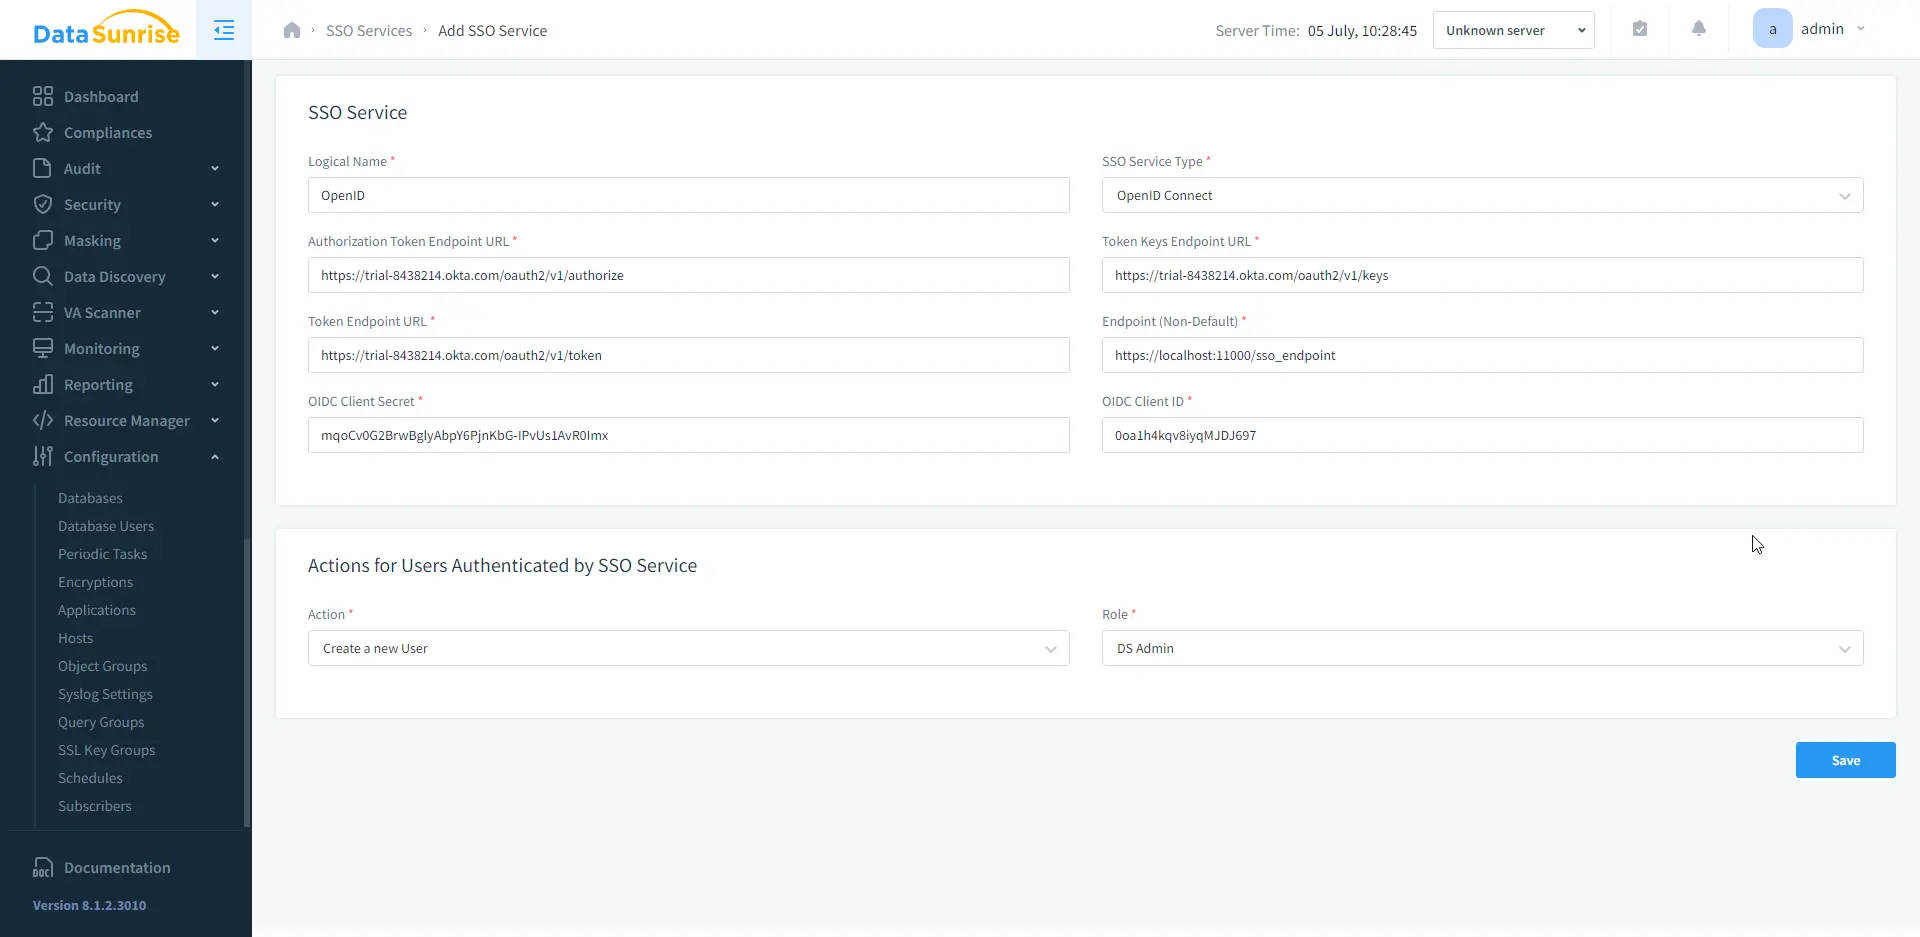
Picture 4: Add SSO Service
After all these steps are done you can log in to DataSunrise with the help of OpenID.
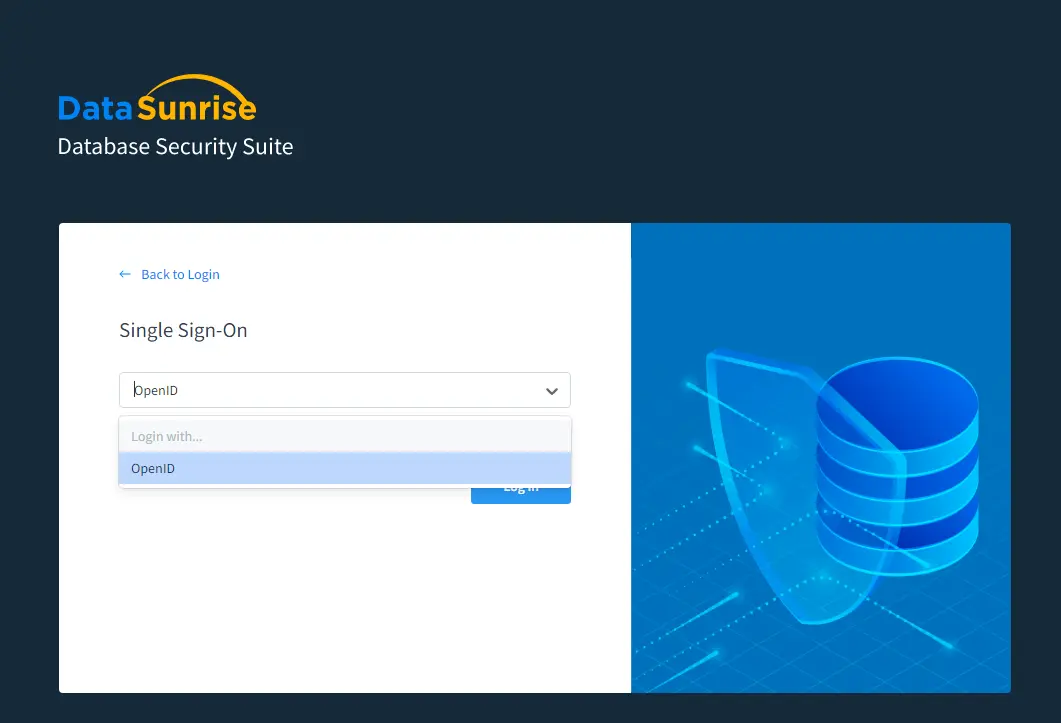
Picture 5: Login with OpenID
As you can see the configuration is quite simple. Now you have the opportunity to log in to the DataSunrise’s Web Console and other applications using one set of credentials.