Percona Server for MySQL Database Activity History

Introduction
Tracking database activity is crucial for optimizing performance, enhancing security, and ensuring compliance. Percona Server for MySQL Database Activity History provides a powerful method to monitor and analyze database events effectively. This feature offers valuable insights into query execution, user interactions, and overall system performance, helping organizations improve observability and make data-driven decisions.
In this guide, we will explore the benefits, setup process, and best practices for leveraging Percona Server for MySQL Database Activity History efficiently.
Setting Up Percona Server for MySQL Database Activity History
To start monitoring database activity, we need a solid foundation. Percona Monitoring & Management (PMM) serves as an excellent solution for database management and activity tracking. One of the easiest ways to deploy this setup is by using Docker Compose, which simplifies containerized environments.
Docker Compose Configuration
For effective activity monitoring, both Percona Server for MySQL and PMM should be in the same network. Below is a working Docker Compose configuration:
version: "3.8"

services:
  percona-mysql:
    image: percona/percona-server:8.0
    container_name: percona-mysql
    restart: always
    environment:
      MYSQL_ROOT_PASSWORD: rootpass
    ports:
      - "13306:3306"
    networks:
      - pmm-net

  pmm-server:
    image: percona/pmm-server:latest
    container_name: pmm-server
    restart: always
    ports:
      - "12443:8443"
    networks:
      - pmm-net

networks:
  pmm-net:
    driver: bridge
Running the Setup
Save this configuration in a docker-compose.yml file and
run the following command:
docker compose up -dThis will launch both Percona MySQL and PMM in the same internal
network (pmm-net). Next, we need to establish a connection
between them.
Connecting Percona Server to PMM
First, list all networks in Docker:
docker network lsYou should see output similar to:
NETWORK ID     NAME                                  DRIVER    SCOPE
3871d927f35b   pmm-mysql_pmm-net                     bridge    local
f53bdb7ddf08   host                                  host      local
c01f889de681   none                                  null      local
Identify the correct network (pmm-mysql_pmm-net in this
case) and retrieve the IP address of the Percona MySQL container:
docker inspect -f '{{range .NetworkSettings.Networks}}{{.IPAddress}}{{end}}' percona-mysqlNow, add the Percona instance at this address via PMM’s GUI:
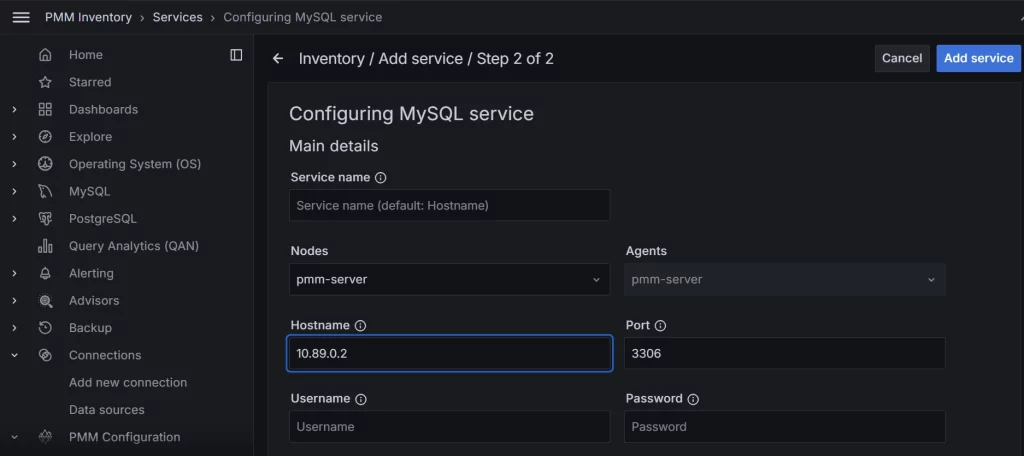
Note: Use the internal port of your Percona Server instance, as connections operate within the container’s network.
Enhancing Security with DataSunrise
While PMM provides a robust monitoring solution, providing robust security for the database environment is equally important. DataSunrise, a database security and auditing solution, can complement PMM by acting as a database proxy. This setup allows for flexible security management.
Integrating DataSunrise with Percona Server
To include DataSunrise in the setup, modify the Docker Compose configuration as follows:
version: "3.8"

services:
  percona-mysql:
    image: percona/percona-server:latest
    container_name: percona-mysql
    restart: always
    environment:
      MYSQL_ROOT_PASSWORD: rootpass
    ports:
      - "13306:3306"
    networks:
      - pmm-net

  pmm-server:
    image: percona/pmm-server:latest
    container_name: pmm-server
    restart: always
    ports:
      - "12080:8080"
      - "12443:8443"
    networks:
      - pmm-net

  datasunrise:
    image: datasunrise/datasunrise:latest
    container_name: ds-server
    restart: always
    ports:
      - "11000:11000"
      - "23306:23306"
    networks:
      - pmm-net

networks:
  pmm-net:
    driver: bridge
Run the updated setup:
docker compose up -dConfiguring the DataSunrise Proxy
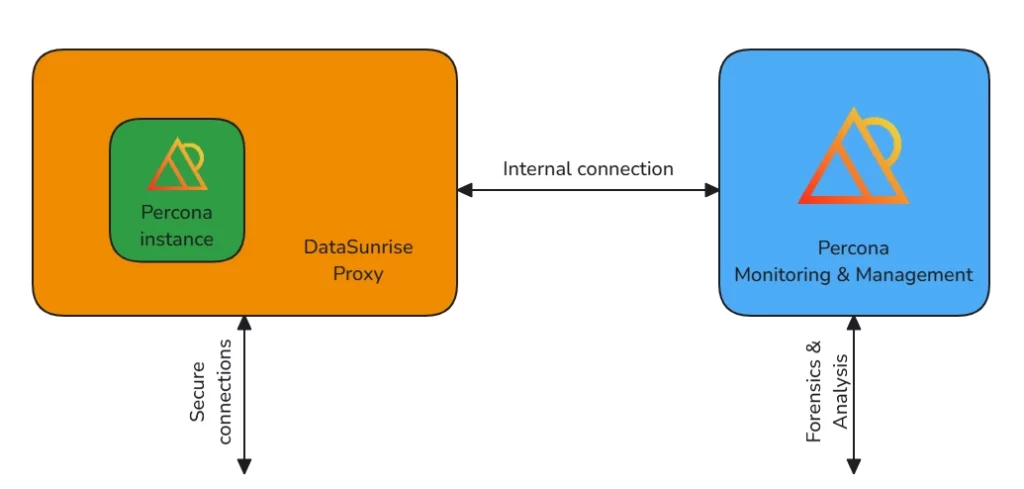
Since DataSunrise acts as a database proxy, it must sit between PMM and Percona Server. If you restarted the containers, recheck their IP addresses:
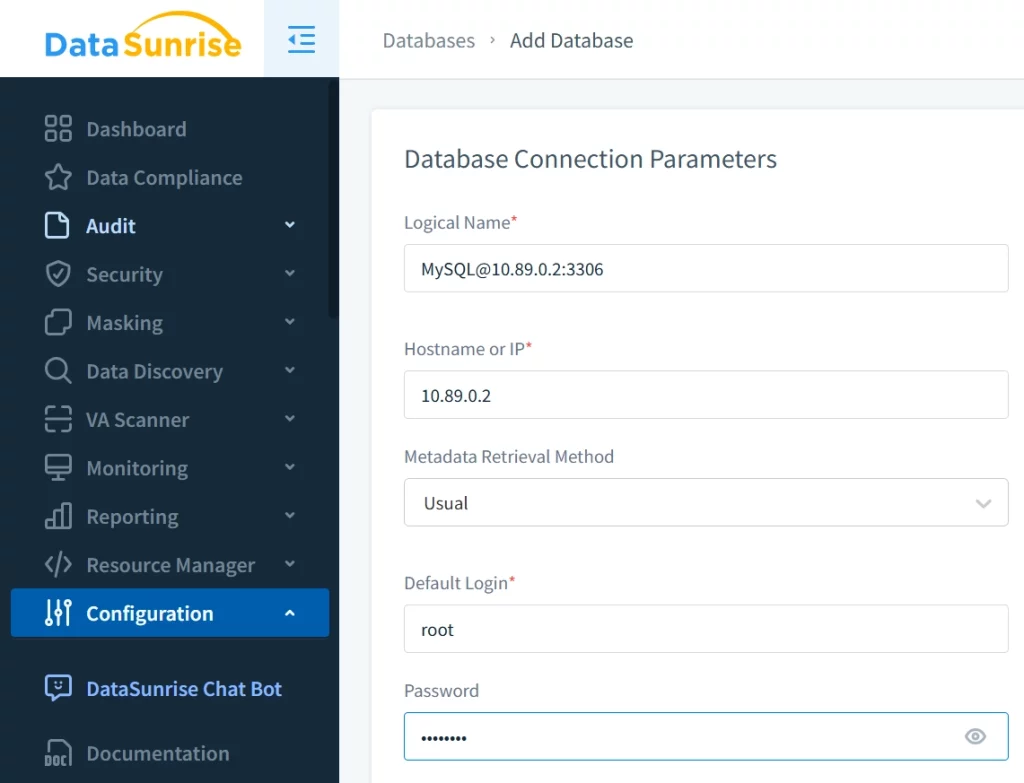
docker inspect -f '{{range .NetworkSettings.Networks}}{{.IPAddress}}{{end}}' percona-mysqlThen, add Percona Server to DataSunrise using its GUI:
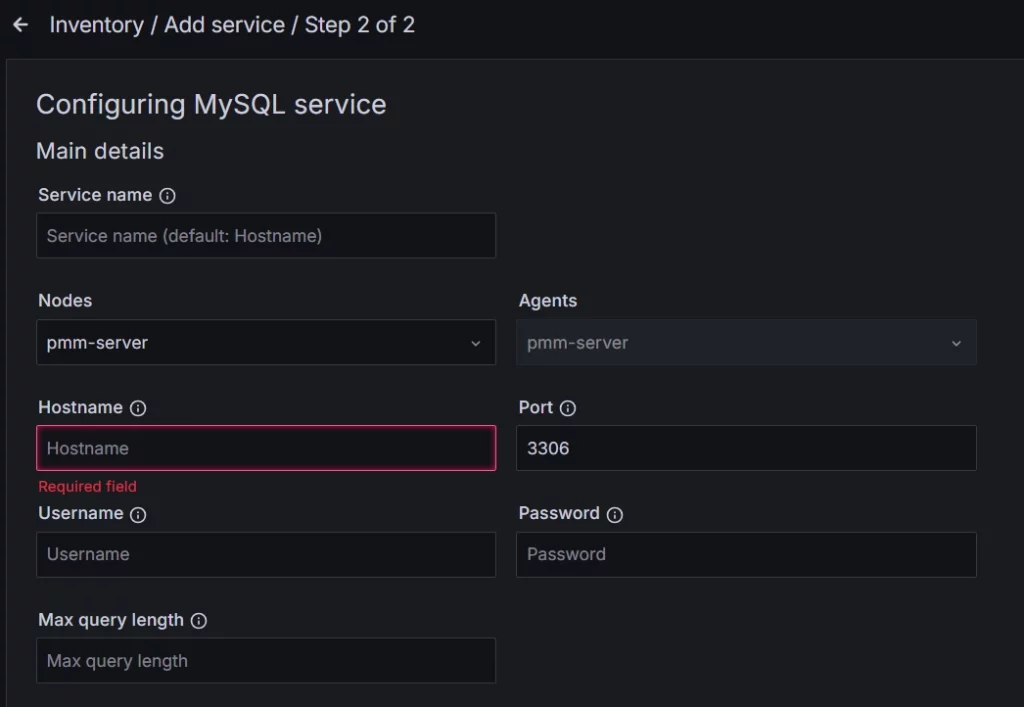
Finally, reconfigure PMM to use DataSunrise as its Percona connection:
With this setup, you can effectively monitor database activity while securing your environment through the DataSunrise proxy.
Conclusion & Best Practices
To maximize the effectiveness of Percona Server for MySQL Database Activity History, consider the following best practices:
- Regularly Monitor Logs – Continuously review logs to identify anomalies and performance bottlenecks.
- Use PMM Alerts – Configure alerts to notify you of unusual database activity.
- Enhance Security with DataSunrise – Implement database security policies and access controls.
- Optimize Query Performance – Analyze slow queries and optimize them for efficiency.
- Maintain Regular Backups – Ensure data integrity with scheduled backups.
By following these steps, you can maintain a well-monitored and secure database environment with Percona Server for MySQL and complementary tools like PMM and DataSunrise.